With the Text Toolkit for Excel, you can easily change case of text in the selected cells in your worksheet. In this manual, find out how to use the Change Case utility.
-
To run the tool in Excel, go to the Home tab and click the Text Toolkit icon:

-
Select Change Case:

-
You will see the Change Case pane. Select your options and click the Change Case button:

- Select the range of cells where you want to change text case.
- Tick this radio button to change all words in a cell to UPPER case.
- Pick lower case to get all text in your cells changed to lower case.
- Select Proper Case to capitalize each word and change other letters to lowercase.
- Choose Sentence case to capitalize the first letter of the first word in each sentence in your cells.
- If there is a check mark next to Don't change cells with formulas, the add-in won't process cells that contain formulas.
- With the Create a backup copy option selected, the Restore button is added and a hidden copy of your sheet will be saved. After the tool has processed your data, the Restore button gets enabled. You can click it and return to the previous version of the processed sheet if necessary.

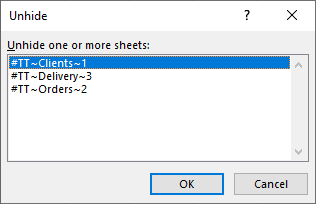
Tip. To see available backup copies, right-click any sheet tab in your Excel workbook and choose "Unhide".

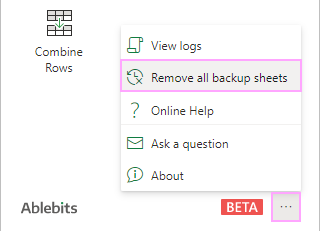
Note. You can delete hidden backups with the Remove all backup sheets option in the More menu. To see it, click the three dots in the lower-right corner of the Text Toolkit pane:


