With the Text Toolkit for Excel, you can easily remove characters by position from the selected cells. In this manual, find out how to use the Remove by Position utility.
-
To run Text Toolkit in Excel, go to the Home tab and click the Text Toolkit icon:

-
Select Remove by Position:

-
You will see the Remove by Position pane. Select your options and click the Remove button:

- Select the range of cells where you want to remove text.
- Choose this radio button to remove a definite number of the first characters from the selected cells. Enter the number of characters to remove into the input field.
- Check this radio button to remove a definite number of the last characters from the selected cells. Enter the number of characters to remove.
- Select All before text to remove all symbols before certain characters. Enter these characters into the input field.
- Tick All after text to remove all symbols after certain symbols. Enter these symbols.
- If you selected All before text or All after text, you can tick the Case-sensitive box to make the tool distinguish the case of text you entered from text in your cells. For instance, with selected Case-sensitive, "E" and "e" will be recognized as different values, though with unchecked Case-sensitive, they will be identified as the same values.
- If there is a check mark next to Don't change cells with formulas, the add-in won't process cells that contain formulas.
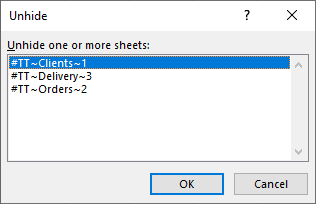
- With the Create a backup copy option selected, the Restore button is added and a hidden copy of your sheet will be saved. After the tool has processed your data, the Restore button gets enabled. You can click it and return to the previous version of the processed sheet if necessary.

Tip. To see available backup copies, right-click any sheet tab in your Excel workbook and choose "Unhide".

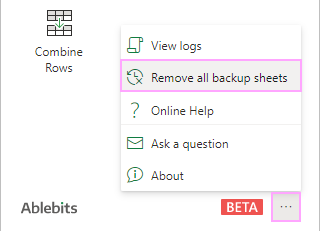
Note. You can delete hidden backups with the Remove all backup sheets option in the More menu. To see it, click the three dots in the lower-right corner of the Text Toolkit pane:


