Shared Email Templates for Microsoft Outlook
How to use mail merge in Outlook
Heads up! We're moving the Shared Email Templates for Outlook documentation to our new site: email-templates.app. The new version will be ready soon, and we hope you'll love the fresh, improved experience. Thank you for your patience during this transition.
In Shared Email Templates for Outlook, you can create and send personalized emails to multiple recipients at once with the help of mail merge campaigns.
Note. Shared Email Templates for Gmail doesn't support mail merge. To mail merge from Gmail, use another product of ours: Easy Mail Merge.
To open a quick How to use mail merge cheat sheet, click the button below.
Video: How to use mail merge
See the full video transcript on the Webinar 5: Using mail merge page.
Before you start
Before creating a mail merge campaign, read the following notes:
-
In order to protect your security, the add-in will ask you to sign in to your Microsoft account every time you finish creating a campaign and click the Schedule or Send button.
This is done this way, so our mail merge service has access to your inbox only from the moment you finish creating a campaign to the second when the campaign messages have been sent.
- The campaign email messages are sent from the Microsoft account you sign in to when finishing creating a campaign.
- To create a mail merge campaign, you need to prepare text for the email message and a mailing list. For the email message, you have three options: a simple template, a mail merge template, and your own HTML text.
- Most probably, your message for the campaign will include merge fields—specific parts of email messages that are set up as variables with the help of the ~%MergeField macro.
- A mailing list is an Excel table that contains email addresses for the campaign and data for the merge fields.
- In a mail merge campaign, the maximum size limit for an email attachment is 3 MB.
- Some macros are not supported in templates for mail merge campaigns. Here is the full list of these macros.
Mailing process and campaign statuses
Your campaigns may have the following statuses: Sending, Pending, Scheduled, Cancelled, and Finished.
When you create a campaign, you can schedule it or send immediately. If the campaign is being sent, it will have the Sending status.
Campaigns are sent one by one in the order you create or schedule them. So, if you create two campaigns and both should be sent immediately, the second campaign will start mailing only after all the emails of the first campaign have been sent. Until then, it will have the Pending status.
The Sending and Pending campaigns can be Cancelled but of course if some messages are already sent, they can't be unsent.
Campaigns that are scheduled for a particular date and time will be marked as Scheduled. Scheduled campaigns can be edited or deleted.
When all the messages of the campaign have been sent, it gets the Finished status.
Note. The duration of a Sending campaign depends on the total number of emails to be sent and the daily email limit set by your company or team account admin.
Mail merge template
For a mail merge campaign, you can use either a simple template or a special mail merge template. Mail merge templates have a ready-made HTML layout and a color theme. Besides, you can import your own HTML-based layout into the message body.
Mailing list
It is an Excel table with email addresses of the recipients and all the info needed to personalize the email messages.
Important notes about the mailing list
- XLSM and XLSX formats are supported.
- The Excel book must be located in OneDrive.
- The table must be formatted as an Excel table.
- Email addresses are to be placed in the first column. Its header must be "email".
Here is an example of a mailing list:

Merge fields
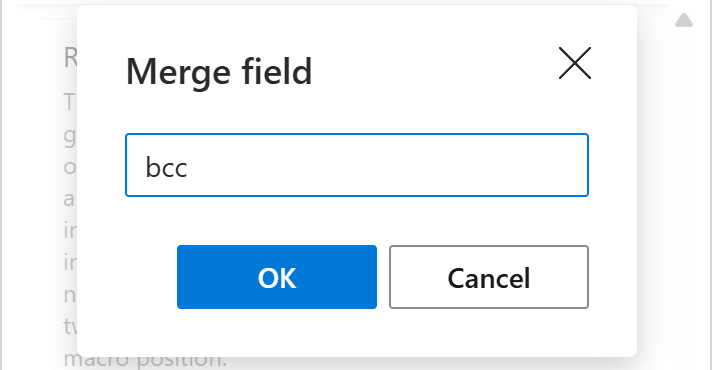
They are variable parts of your template. You can change them depending on the addressee. The ~%MergeField macro is there to help. It retrieves the necessary data directly from the mailing list. You just need to type the name of the corresponding column in the dialog box that appears when you insert the ~%MergeField macro into your template.
For example, with the mailing list shown in the screenshot above, you would need to type "discount" to get a specific discount value retrieved from the discount column and pasted into the message that is sent to a specific recipient:

How to send personalized attachments
Note. The maximum size limit for an email attachment is 3 MB.
- In your mailing list, add a column for the names of the files to be attached. The column header must be "attachments".
- In the attachments column, enter the file names, including extensions.

Note. If you want to send several files to the same recipient, enter the file names into the corresponding cell, separating them with a comma or a semicolon.
- While creating your mail merge campaign, select the folder that contains the necessary attachments.

How to add multiple To, Cc, and Bcc recipients
- To your mailing list, add column(s) for additional email addresses, for example to, cc, or bcc.

Note. To separate email addresses within a cell, use a semicolon or a comma.
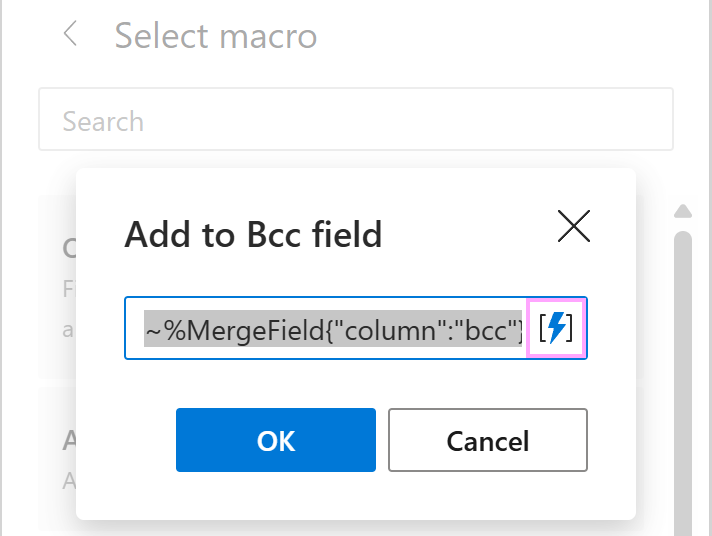
- In the template for your mail merge campaign, use the corresponding option of the ~%Add macro: Add to To, Add to Cc, or Add to Bcc combined with the nested ~%MergeField macro.

Note. When nesting the MergeField macro within the Add macro, you need to specify the mailing list column that contains the necessary email addresses.

For step-by-step instructions on how to nest a macro, visit this help page.
Create mail merge template
To create a mail merge template, right-click My Templates, a folder, or a team and select New Mail Merge Template from the menu:

In your default browser, a new tab with the Shared Email Templates web application will open. First, you'll be asked to select a layout and click Next:

Select a color theme and click Finish:

You'll see the ready template layout. Enter your text, paste images, and add hyperlinks.
Edit mail merge template
A detailed guide to editing mail merge templates is available here.
Add merge fields
Into the places where custom information from the mailing list should appear, enter the ~%MergeField macro.
Put the cursor where the text should be pasted and click the Insert macro icon on the toolbar:

On the Select macro pane, type "merge" into the Search box and select the suggested Insert Merge Field:

The macro dialog window will appear. Type the header of the column containing the values to be returned and click OK:

Add as many merge fields as you need. When you're done, name the template and click the Save button:

Create mail merge campaign
To start creating a mail merge campaign, click Mail Merge:

Then click the New Campaign button at the bottom of the add-in pane:

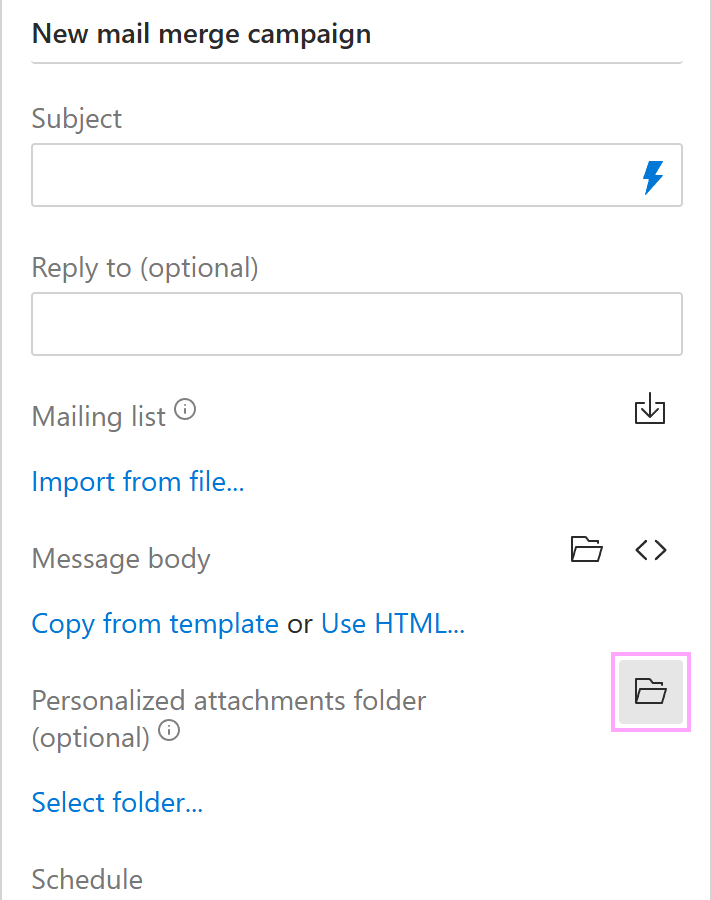
Fill in the following fields:

- Enter a name for your campaign. It will be displayed only in the Shared Email Templates UI.
- Type in the text your addressees will see in the Subject line of the email received.
- If needed, enter the email address for reply messages.
- Click this icon to import the mailing list. Here are some important notes about the mailing list and detailed information on the process of importing.
- Here you define the message body of the emails. You can either select a template or paste your HTML-based message. See more details below.
- Select the folder where attachments intended for the recipients are stored. Make sure the files names are listed in the attachments column of your mailing list. If two or more files are going to be sent to the same recipient, enter the files names into the corresponding cell separating them from each other with a comma or a semicolon.
- You can set a date and time for the campaign to schedule it. In this case, the button will change from Send to Schedule.
- Or select Immediately to start mailing right after clicking the Send button.
- Select this checkbox to save all the sent messages in the Sent Items folder in your Outlook.
- Click Send or Schedule to start the campaign. As soon as you do this, you'll be asked to pick the account from which the mailing should be performed and confirm accepting the needed permissions.
To see all the campaigns, switch to the Mail Merge view:

As soon as the campaign is finished, you'll see a short report saying when the campaign ended and how many email messages were sent:

Import mailing list
Before selecting the mailing list, make sure it meets all the requirements.
Click Import from file:

In your OneDrive, select the necessary Excel workbook:

Choose the table and click Select:

Define message body
For the message body, you can choose any of the two options shown in the screenshot below:

- To use a template from the add-in, click Copy from template and select the necessary template.
- To paste your own HTML text, opt for Use HTML.
Required permissions
To create a mail merge campaign for the first time, the add-in will request the permissions listed in the screenshot below:

For detailed information on how we use granted permissions, please see our Privacy, security, and data safety notes.
Mail merge campaigns statuses
Campaigns in different statuses are marked with different icons:

- Scheduled campaign will start on the indicated date and time. Can be edited, moved to another folder/team, or deleted.
- Sending campaign is being sent at the moment. Can be canceled but of course if some messages are already sent, they can't be unsent.
- Pending campaign will start mailing as soon as the Sending one is finished.
- Finished campaign can be moved to another folder/team or deleted.
- Cancelled campaign can be deleted or activated anew. To do this, select the campaign, click on the Edit icon on the toolbar, make changes if necessary, and click the Schedule or Send button.
Edit and cancel mail merge campaigns
Scheduled
If the campaign is scheduled, you can edit, move to another folder/team, or delete it by clicking the corresponding icon on the toolbar:

Sending or pending
If the campaign is being sent or is pending, you can cancel it:

Unsupported macros
Due to the technical limitations, the following macros are not supported in templates for mail merge campaigns:
- ~%Fill
- ~%Insert (except for mailbox, profile, team, and AAD properties)
- ~%RegexMatch
- ~%RegexExtract
- ~%DisableIf
- ~%Clear
Please contact us here