Welcome to Shared Email Templates for Microsoft Outlook / Gmail. Our add-in can make your daily email tasks easier by allowing you to create templates and share them with your colleagues. You'll start by setting up your account and adding your colleagues to it. Next, you'll learn how to create templates for your team. We'll also cover tips on how to add personalized greetings, automatically attach files, insert pictures, and more.
Note. We offer two editions of Shared Email Templates: one for Microsoft Outlook and one for Gmail. If you'd like to learn the difference between them, visit this page.
Note. If you haven't created a company or team account yet, see this guide to get started.
Step 1: Access your company or team account
In the Shared Email Templates pane in your Outlook / Gmail, click the three dots in the lower right corner and select Manage account.

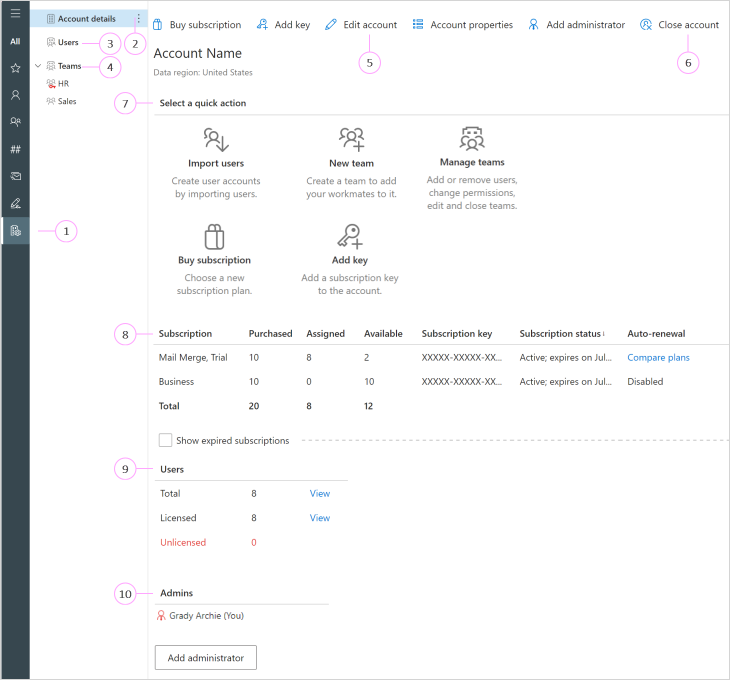
The Shared Email Templates app will open in your default browser:

- Manage account. Available for admins only.
- Account details. You'll find your account name, data region, subscriptions, users, and admins here.
- Users. Select this section to see a list of users.
- Teams. Select this section to view existing teams.
- Edit account. Select this button to edit the account name, add a website link, and provide contact details.
- Close account. By selecting this button, you can delete your company or team account, including all users, teams, and templates, with no way to recover the data.
- Quick actions. Import users, create and manage teams, choose a subscription plan, and add a subscription key by selecting a corresponding button.
- Subscription. View your subscriptions, check their status, and renew them if needed.
- Users. See the total number of users, including those licensed and unlicensed.
- Admins. Here you can find users with admin rights and add or remove admins.
Note. If you've already bought a subscription, you'll see its details. Within your trial period, you can choose which subscription to use: either the purchased subscription or the trial one.
Tip. To change the account name, select Edit account, enter the new name and click Save.

Step 2: Add users to your account by importing them from Azure AD (Microsoft Entra ID)
You can add colleagues to your account by importing them from Azure AD (Microsoft Entra ID).
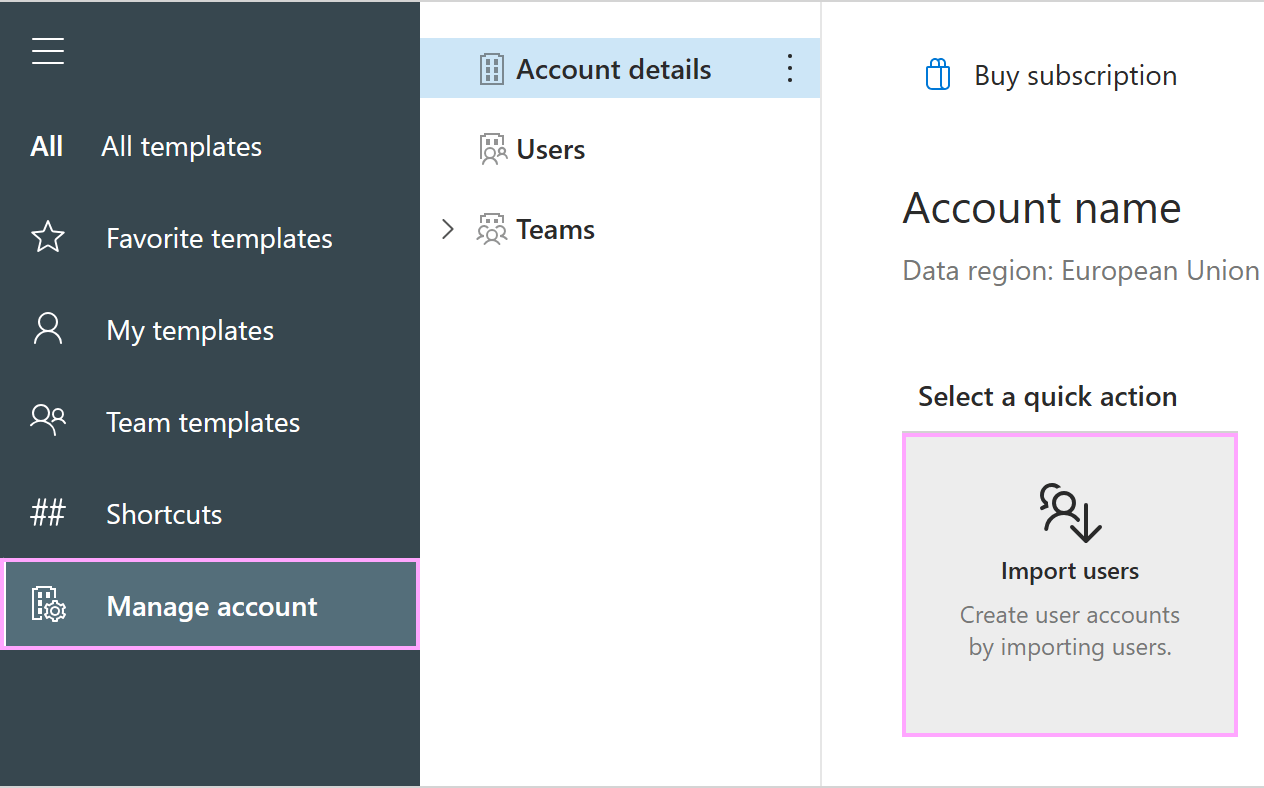
- On the Manage account tab, select the Import users button.
- Select either Microsoft Active Directory or Microsoft Active Directory group.
Note. To import users from Azure Active Directory group (Microsoft Entra group), you need to have Microsoft 365 admin permissions.
- Sign in to your Microsoft work or school account, select the colleagues you want to add to your account, and click Import.

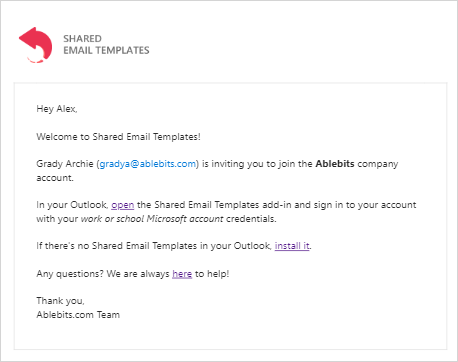
Your colleagues will receive an invitation email from the Ablebits Support team with the detailed information on how to join the account and get started with the add-in:

Step 2: Add users to your account by importing them from Google Wrokspace Directory
You can add colleagues to your account by importing them from Google Workspace Directory.
Note. You must have admin rights to access Directory.
- On the Manage account tab, select the Import users button.

- Select either Google Workspace Directory or Google Workspace Directory group.
- Sign in to your Google account, select the colleagues you want to add to your account, and click Import.
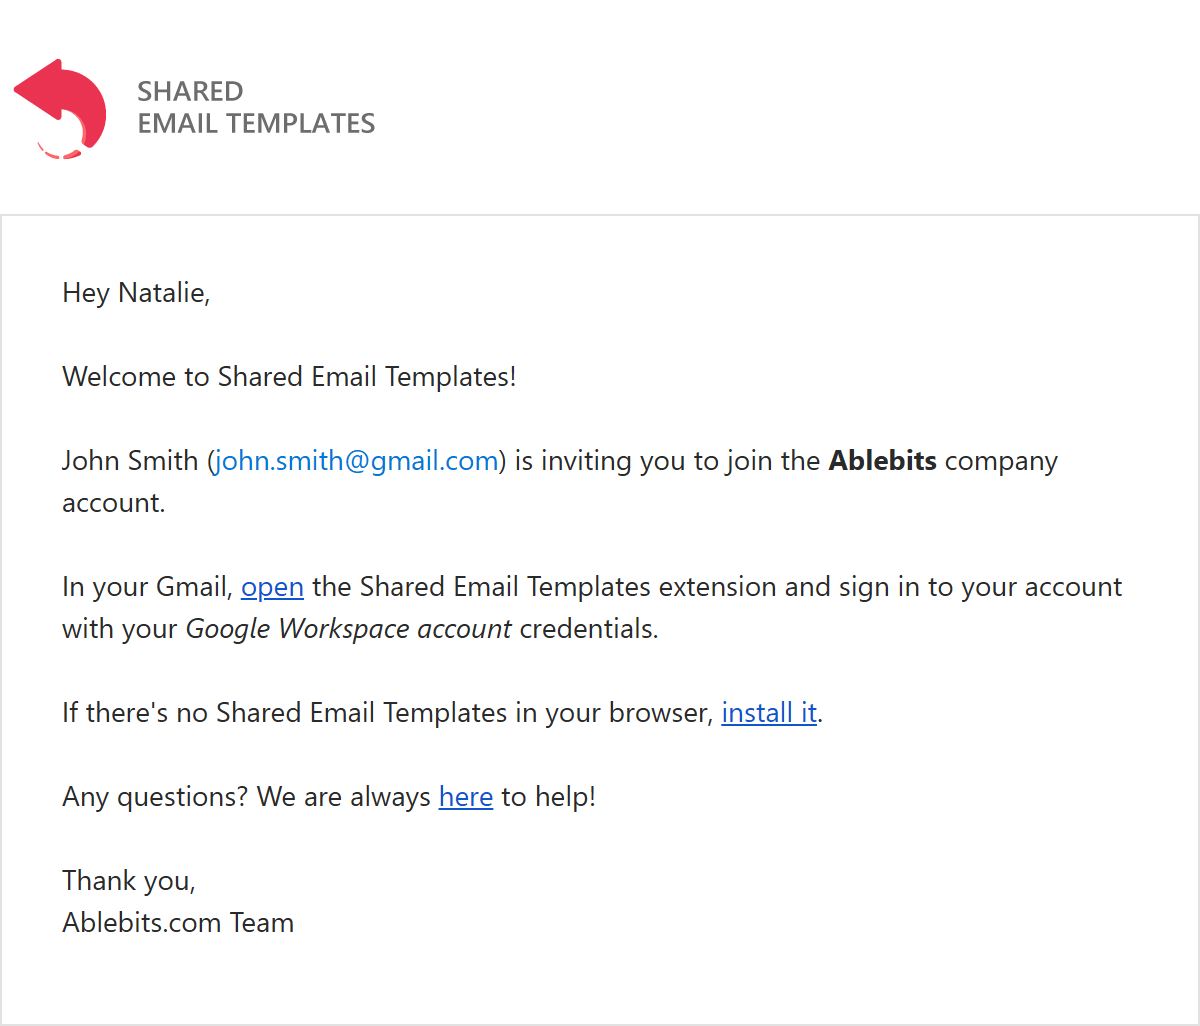
Your colleagues will receive an invitation email from the Ablebits Support team with the detailed information on how to join the account and get started with the extension.

Note. We recommend adding at least one more admin.
- In the Account details section, click the Add administrator button.
- Select a user you want to grant admin rights to, and then click Add.

- On the Manage account tab, click New team. Enter the name for your team. You can also add a description. Click Save.
Note. If you want to
create an encrypted team, set a password. Remember, you're responsible for sharing it with team members. It won't be possible to change or remove the team password.
- Select the team and click the Add users button. Choose users from the list, set their permissions (User or Editor), and click Add to add them to the team.

Step 5: Create team templates from selected text
- In the add-in pane, select a team or a folder in a team.
- In your email message, select the text that you want to use as a template.
- Click the New template button.
- Name your template.
- Save your template.

Step 6: Create templates with auto-fillable fields
- Select a team or folder in a team and click New template.
- Enter the name and text of your template.
- Add an auto-fillable field for a personalized greeting:
- Click the Insert macro button.
- Select Insert greeting.
- Type new greeting phrases or use the default ones, and then click OK.

Step 7: Create templates with interactive fillable fields
Interactive fillable fields in templates let you enter text, use date and time pickers, or select data from dropdown lists and datasets, while inserting a template into an email message. To add these fields to your templates, use the WhatToEnter macro. For example, if you want to add a date picker, do the following:
- Select a team or a folder in a team and click New template.
- Enter the name and text of your template.
- Place the cursor where you want to insert a date picker and select the Insert macro button.
- Select What to enter.
- Select Date. Enter the field name, choose a date format and locale, and then click OK.
- Save your template.

Note. If you want to make changes to your template, select it and click Edit in browser to open the app in your default browser and edit the template there, or click Edit to make changes directly in the add-in pane.
Step 8: Create templates with message attachments
- On the template editor toolbar, click the Message attachments button.
- Select the file you want to automatically attach to your email message when inserting the template.
- Save your template.

Step 9: Create templates with images
- On the template editor toolbar, click the Insert picture button.
- Select the picture you want to add.
- Adjust the picture size if needed, and then click OK.
- Save your template.

See also


Please contact us here