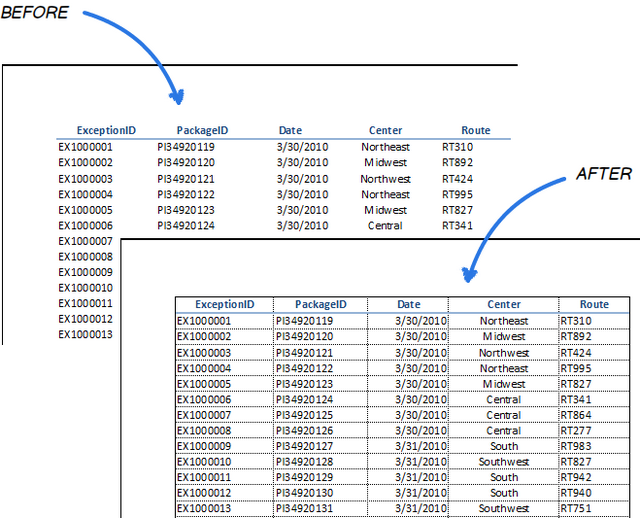
One of the most common complaints about gridlines is that they are not printed by default. In this article you'll learn how to print gridlines in Excel and get these faint lines brighter on a hard copy by changing the default gridline color.
It's a good idea to preview your worksheet before getting it on paper to make sure that it looks the way you want. Luckily, Excel 2010 and 2013 allow you to preview and print your files in one location -- on the Print tab in the Backstage view. When you go there, you may find that Excel won't print gridlines in your sheet. As the result, you will get a stack of papers with the data that can be difficult to separate visually.
To cope with this problem, you can use the Borders option or just make Excel print gridlines. The first way will take you a good deal of time. So if you, as many other users, want to do it faster, read this article and find out how to print lines in Excel without drawing cell borders.
Turn on the Print Gridlines option in the Excel Ribbon
It really takes you a few seconds to instruct Excel to print gridlines. Just go to the Sheets Options group on the PAGE LAYOUT tab and check the Print box under Gridlines.

It's that simple! Now you can leisurely keep working on your worksheet.
If you want to make sure that the document will be printed with gridlines, just navigate to FILE -> Print or press the Ctrl + P keyboard shortcut. In the Print Preview pane you will see how your worksheet will look like on the printouts.
Specify the Page Setup settings to print lines in Excel
If you forget to enable the Print Gridlines option in the Ribbon, you can do it just before getting a paper copy of your spreadsheet. Here are easy-to-follow steps to print gridlines in Excel keeping the Print Preview pane open.
Note: If you've already got out of the Backstage view, you can either go to FILE -> Print or press Ctrl + P to come back.
- Click on the Page Setup link under the Print Settings list.
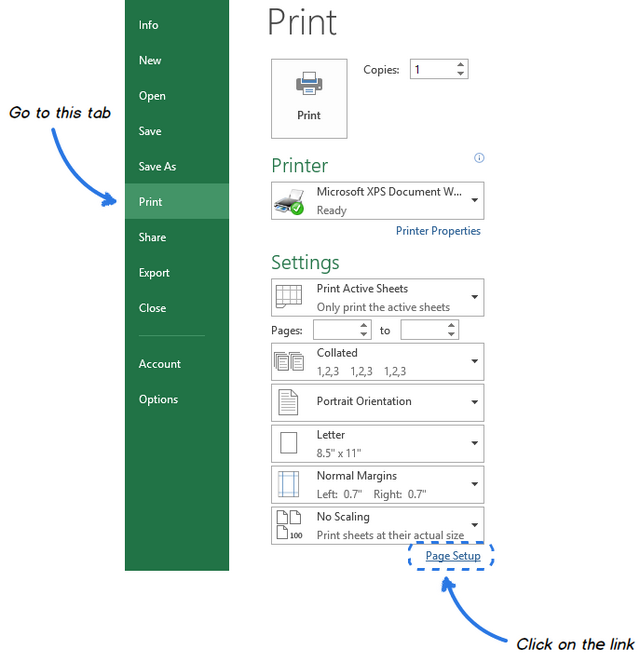
- Move to the Sheet tab of the Page Setup dialog box.
- Select the Gridlines checkbox in the Print group.
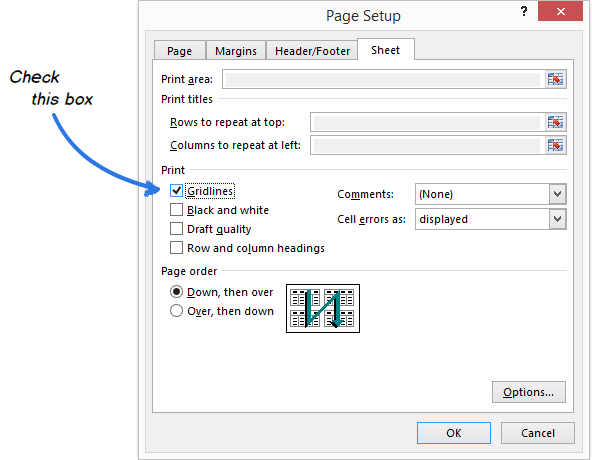
- Click OK.
You will immediately see your spreadsheet with lines in the Print Preview pane.
Note: Excel does not print gridlines around empty cells in a worksheet. If you want to include blank rows and columns into printing as well, just use the Print Area icon to set the range.

Change the printed gridlines color
By default, gridlines in Excel spreadsheets are light gray. If you're printing your sheet with grid on a color printer, you can change the lines color for something more attention-getting.
- Click the FILE tab in the Ribbon.
- Choose Options from the FILE menu to open the Excel Options dialog.
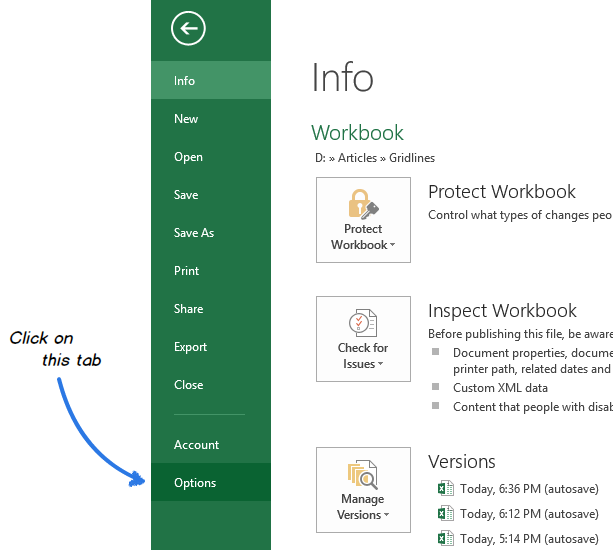
- Select the Advanced category on the left pane of the Excel Options window.
- Scroll down to Display options for this worksheet.
- Pick the sheet from the drop-down list where you want to change the grid lines color.
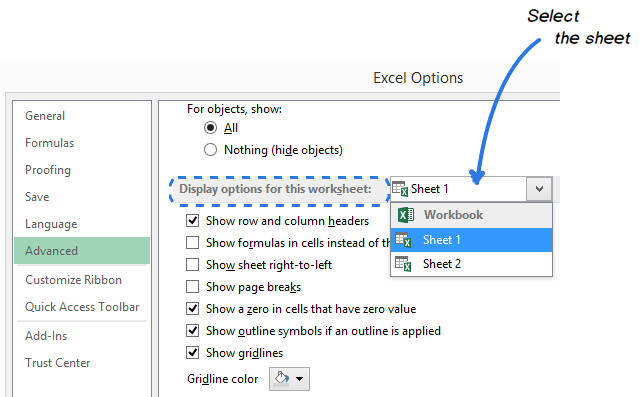
- Make sure that the Show gridlines checkbox is selected.
- Click on the small arrow next to Gridline color.
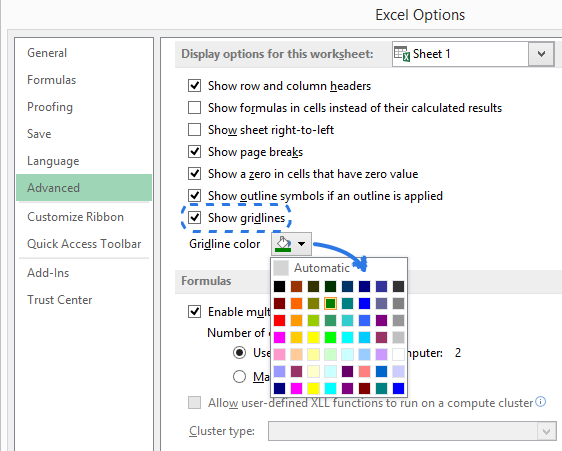
- Choose the color you want and click OK.
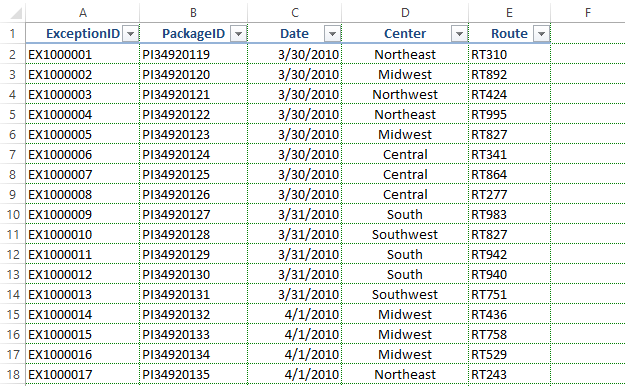
You will see that the cell boundaries are accurately outlined by colored lines. They will help you read information on the paper copy of your spreadsheet, keeping rows and columns with data visually organized.
Alongside with grid lines, you can also improve readability of your Excel document by printing row and column headers on every page.
Now you know how to print gridlines in Excel 2016-2010 and change the default gridline color. I hope you'll find these simple tricks helpful, and your colleagues will appreciate your friendly way of printing out data.
 by
by
4 comments
All of the tips on this page are excellent and are likely to be helpful to many. However, despite my having all the settings described above to PRINT gridlines (I have Excel 2010; Win 7), SOMETIMES my gridlines (and borders and underlines) do not print even though they show in Print Preview. (There is nothing systematic that I could detect about when this would happen.) What fixes the problem for me is saving the file, closing it, then opening it again. (Just saving is not sufficient.) Everything prints fine from that point on, even after closing the file and opening it again later, in other words, it is a permanent fix for that file. I don't understand why this works for me, it just does. By the way, I use an old HP1100 LaserJet printer. I saw some other webpages about this problem, and they mentioned the issue might be with the age of the printer or the printer driver. My driver is the one recommended by HP for Win 7.
Larry! I tried all of the other suggestions, but none worked until I closed and reopened as you suggested. Thank you!
I have the opposite problem. I have random gridlines printing in worksheets and all options for printing gridlines are not selected to print. Ideas?
Hello Kimmer,
There may be some custom border applied to your table.
Just select the range where the issue occurs (the entire worksheet) and press Ctrl + 1. Move to the "Border" tab and click on the "None" icon, then press OK.
Hope this will help.